Artwork Setup Guide
How can you create print-ready artwork for your strut cards print order?
Simply follow our handy guide below!

Get the size & resolution right
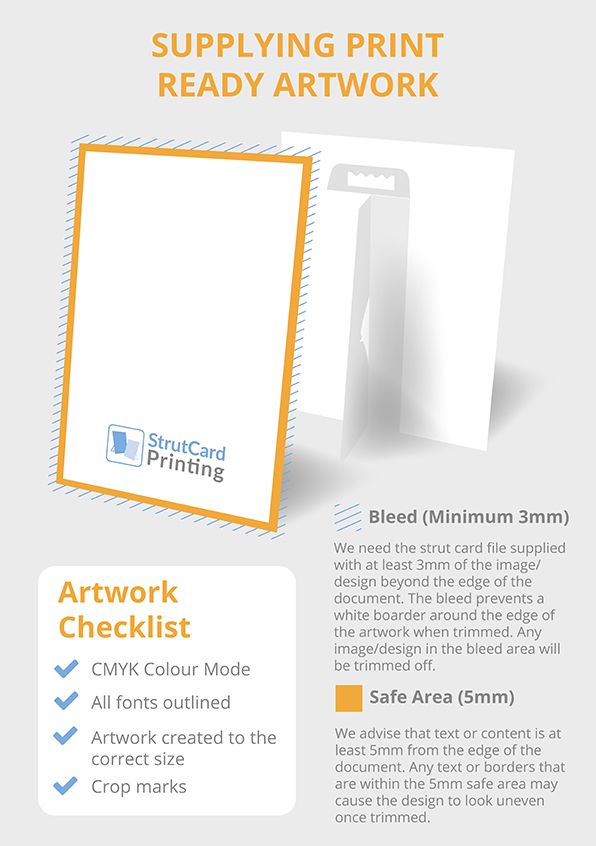
When starting a new design, make sure the size of your canvas matches the size of the finished strut card – plus a 3mm bleed area all around.
Artwork should be set to 300dpi. Don’t forget to convert any images you’ve imported into your design to 300dpi resolution as well!
Create your art in CMYK mode
Most digital design software will be set to an RGB colour profile by default. To ensure the colours you’ve chosen on-screen are the colours you’ll get in the final print, go into your design program’s settings and select CMYK mode instead.
Again, any images imported into your design should be set to CMYK too!
Embed or outline your fonts
Your font choices can get lost when transferring your files over to the printer.
To preserve them, you’ll either need to convert the text to outlines (which keeps the shape of your text intact, but prevents you from editing the words later if you need to) or you’ll need to embed the font files within your artwork files.
Most design software programs will enable you to embed fonts when saving your final design.
Save your artwork as a PDF
At StrutCards.co.uk, we prefer to receive artwork files in PDF format; although our team can also work with Adobe Photoshop, Illustrator and InDesign project files and other formats.
Whatever you do, please don’t save your files as interactive PDFs – these aren’t a great fit for printing!
Need help with any of the steps above? Or need more advice on setting up custom shapes or variable data printing? Simply get in touch on 02380 878030 or Sales@StrutCards.co.uk today!
